W e l c o m e t o H i e v e r
M e t a l w o r k s

Loading

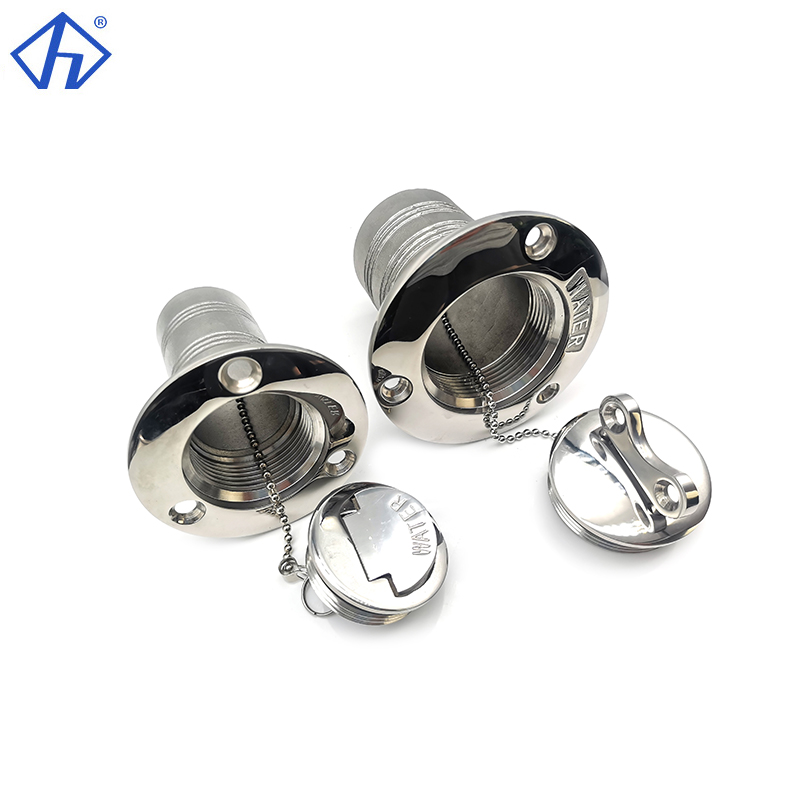
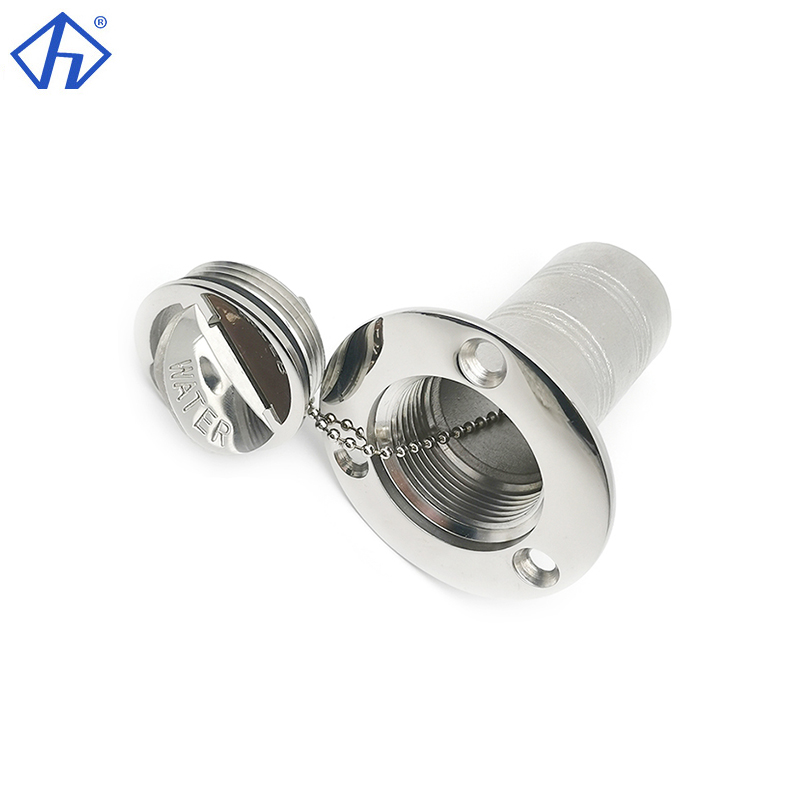
Deck Fill Stainless Steel Deck Fill With Key Boat Yacht Deck Filler

Heavy Duty Stainless Steel Deck Fill With Key Boat Yacht Deck Filler 38mm 50mm

Whether it's a small speedboat or a medium-sized fishing vessel, the stainless steel deck fill with key is not only a channel for adding fuel/water, but also a "safety guardian" for the fuel and water tanks. Made of 316 stainless steel with a practical design, this durable material and functional design help you withstand navigational risks.
Read More
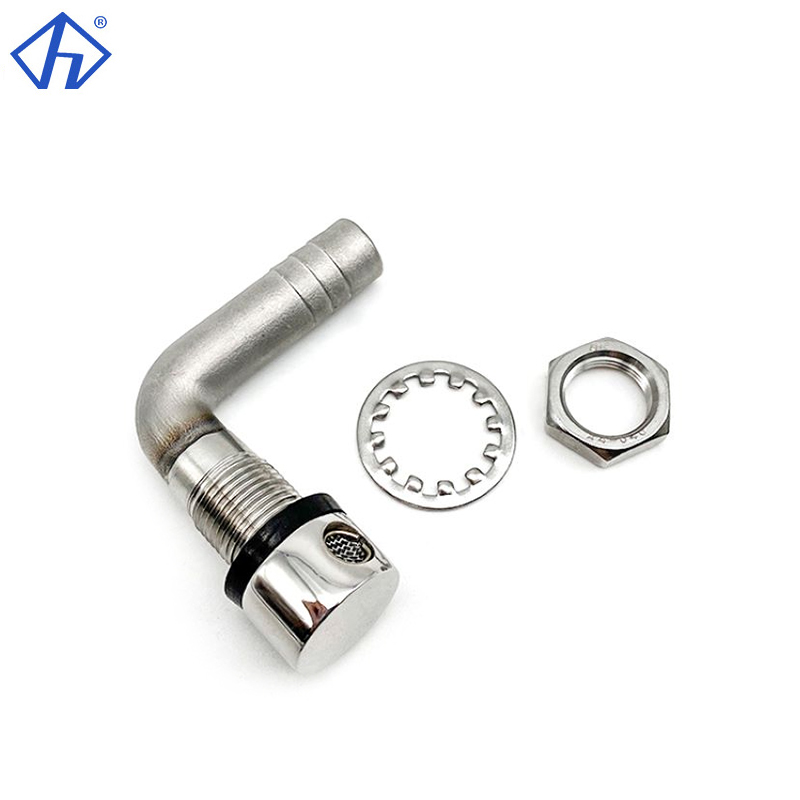
Boat Yacht Fuel Tank Vent 90 Degree Tank Vent Thru Hull Fuel Gas Tank Vent

Boat Yacht Fuel Tank Vent 90 Degree Tank Vent Thru Hull Fuel Gas Tank Vent

Like the straight fuel tank vent, it is made of 316 stainless steel. However, unlike the straight tank vent, this 90 degree fuel tank vent cleverly solves the problem when the fuel tank installation space is limited.
Read More
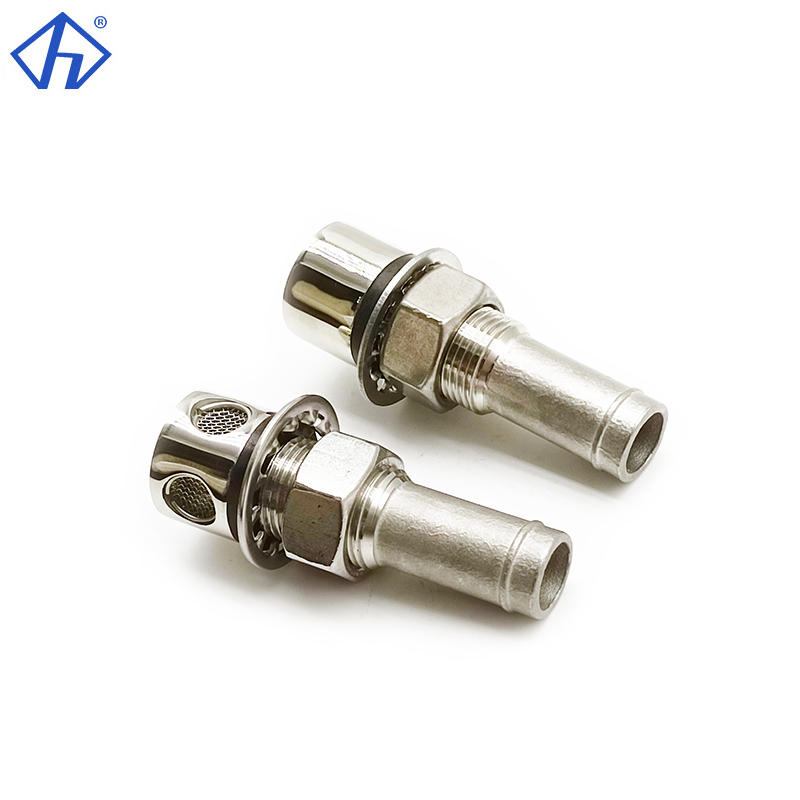
High Precision Boat Fuel Tank Vent Straight Fuel Gas Tank Vent

High Precision Boat Fuel Tank Vent Straight Fuel Gas Tank Vent Marine Hardwares

Hiever's boat fuel tank vent is compatible with various marine fuel tanks, truck fuel tanks, and chemical storage tanks. During refueling, the filter screen in the straight fuel tank vent permits ventilation while keeping contaminants out.
Read More
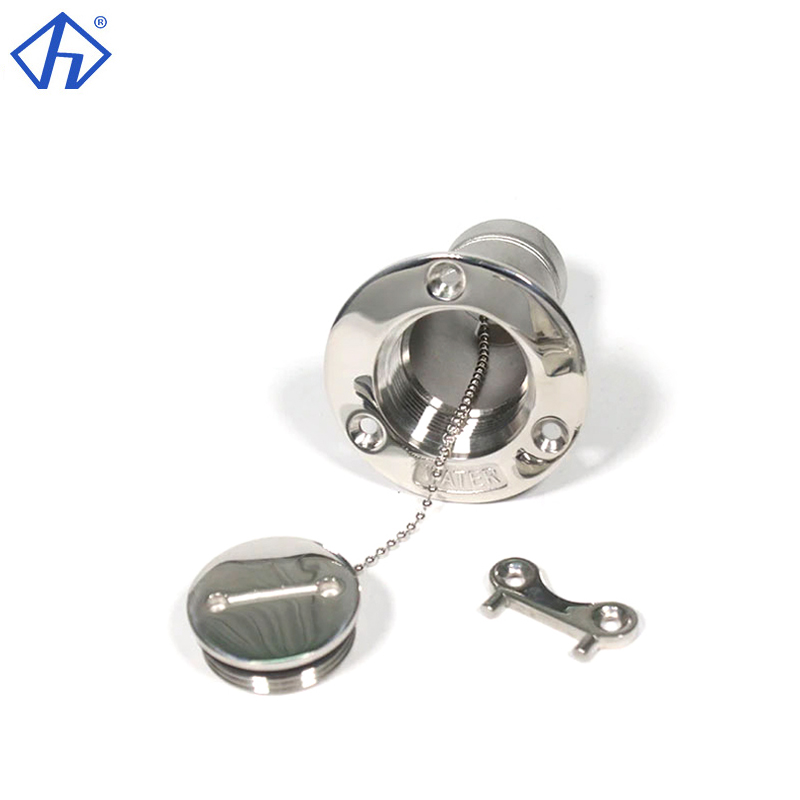
Stainless Steel Marine Boat Deck Filler With Key Deck Fill For Fuel Water

Stainless Steel Marine Boat Deck Filler With Key Deck Fill For Fuel/Diesel/Water

This marine deck filler with key not only provides fuel/fluid replenishment during navigation, but also builds a protective wall for fuel tanks and water tanks.
Read More
Marine Boat Deck Fill SS316 Diesel Fuel Water Tank Deck Fill Filler With Keyless Cap

Marine Boat Deck Fill SS316 Diesel Fuel Tank Deck Fill Filler With Keyless Cap

This marine deck fill is a crucial component for refueling ships, yachts, motorboat and other watercraft. Made of 316 stainless steel, the deck fill filler resists salt spray corrosion and long-term exposure to sunlight and rain. The deck fill filler is a reliable piece of equipment for navigational safety. Hiever's SS316 fuel deck fill filler serves as both a "safety door" for the fuel tank and a "worry-free partner" during voyages.
Read More
HOME ABOUT3
Features

Sign Up and Never Miss a Deal Again

We are committed to providing our customers with excellent service, competitive pricing, and a wide variety of products to choose from.

    Your Name*

    Email*

    Tel*

    WhatsApp*

    Message*

    Latest News

    Check out our blog posts

    View More
    TOP-Why Does an Anchor Swivel Jam at the Bow Roller Chain Fit and Clearance Explained

    Why Does an Anchor Swivel Jam at Bow Roller? Chain Fit and Clearance Explained

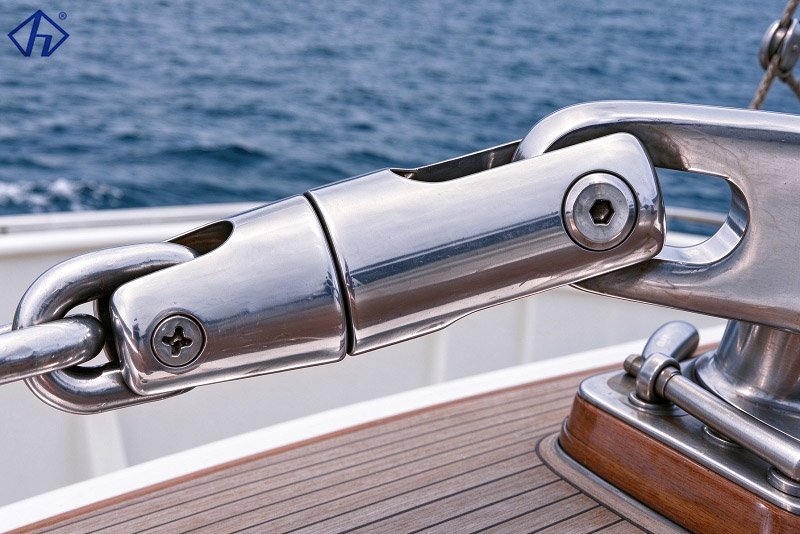
    An anchor swivel connector is intended to help an anchor and chain align during deployment and retrieval. If the assembly catches at the bow roller, however, the problem may involve the connector’s outer shape, chain alignment, roller geometry or the way the anchor approaches the bow. Replacing the swivel with another part of the same advertised chain size may not solve the snag. This guide explains the checks boat owners, installers and marine hardware buyers can make before changing a connector or modifying an anchoring setup. Where Does an Anchor Swivel Usually Catch? Observe where resistance starts rather than assuming the rotating joint has failed. The point of contact gives a useful clue about which dimensions need checking. Can the Connector Body Hit the Bow Roller? The swivel body can be wider or longer than the chain links it joins. As it reaches the roller, a broad shoulder or projecting pin head may contact the cheeks, roller groove or nearby guide. A fitting that moves freely while hanging below the bow can still jam as the chain changes direction over the roller. Measure the narrowest passage through the entire retrieval path, not just the roller groove at its center. Can the Anchor Arrive at the Wrong Angle? The anchor shank, connector and final chain links must pass through a changing angle as the anchor approaches the bow. If a joint reaches its travel limit at that point, the assembly may wedge or lift off the roller. Run the movement slowly in a safe space, keep hands clear of pinch areas. If the connector looks bent or damaged, stop operation right away. Don’t reuse until the full anchoring assembly is inspected. How Should Chain Size and Connector Clearance Be Checked? A nominal chain size is only the start of compatibility checking. Buyers need the geometry of both the chain end and the connector. Does “6–8 mm” Confirm a Correct Fit? No. It is a marketed size range, not a substitute for matching the actual chain profile, link dimensions and pin engagement. HIEVER lists a double swivel anchor connector for 6–8 mm and 10–12 mm chain with a double-pivot joint and AISI 316 cast stainless steel construction. Confirm which size variant is being quoted and request dimensions for its end openings, pins, overall width and length. Also confirm the chain type and link geometry. Two chains described by the same nominal diameter can have different link lengths or widths. The connection must permit the required articulation without side-loading a pin or trapping a link. Which Bow Roller Dimensions Are Relevant? Measure the roller groove, side-cheek spacing and the clearance beneath any retaining bar or bail. Check the distance from the roller to the anchor stop and the point where the chain changes direction toward the windlass. Compare these measurements with the complete connector profile at the angles it actually assumes in motion. Photographing a trial fit from the side and above can reveal where the interference begins.   Can a Double-Pivot Swivel Prevent Snagging? A joint that can articulate in more than one direction may help the connector negotiate a bend, but more movement is not a guarantee of compatibility with the vessel’s bow arrangement. When Might Extra Articulation Help? A double-pivot design can give the connector additional freedom as the chain and anchor shank change direction. HIEVER’s double-pivot swivel chain connector is marketed for smoother passage over anchor rollers and reduced chain twist. Its benefit in a particular installation still depends on body dimensions, joint travel and clearances. A longer articulated connector may also occupy more space near the bow stop, so test the complete assembly before assuming that more joints will solve a jam. What Else Can Cause a Swivel to Bind? A seized or contaminated pivot, damaged pin, uneven wear or excessive sideways pull can limit movement even when the dimensions were originally correct. Salt and dirt collect on tight mating surfaces. Look the connector over for cracks, bends, rust and loose parts. Use the maker’s maintenance and replacement instructions. Never grind load-bearing connectors to fit the roller. What Should Be Verified Before Replacing the Connector? The anchor, chain, swivel, bow roller and windlass operate as a connected system. A replacement decision should account for all of them. How Do You Confirm the Required Strength? Request the connector manufacturer’s applicable working load limit, minimum breaking strength, test documentation and permitted use, then check these against the complete anchoring system and vessel requirements. The advertised 6–8 mm or 10–12 mm fit does not establish a safe working load. The grade of stainless steel also does not replace strength verification. Check what orientation the connector should be fitted in, and see if we need any shackle, pin or extra link. What Should a Boatbuilder Include in the RFQ? Provide the chain standard and actual link measurements; anchor model and shank thickness; bow roller groove and side clearance; available room to the anchor stop; desired connector orientation; required strength documentation; and operating environment. A short video of the current snag can be more informative than a catalog photograph. Buyers sourcing related anchor and deck hardware should request a sample for an installed fit check before volume orders. How Can HIEVER Support Anchor Connector Sourcing? Supplier specifications should distinguish documented product features from the performance that still needs to be confirmed on the boat. What Is Available in HIEVER’s Product Range? Yantai Hiever Metalworks Co., Ltd. lists stainless steel marine anchoring accessories, including single- and double-swivel connector designs. Its double-joint product page identifies AISI 316 casting, a mirror finish and 6–8 mm / 10–12 mm variants. Boatbuilders and distributors can send drawings or samples to discuss dimensional compatibility and request the strength and inspection documents relevant to their project. Never substitute the supplier’s general product description for validation of the finished installation.Yantai Hiever is the professional supplier of marine and industrial stainless hardwares more than 20 years,do not hesitate to send your inquiry to our energetic team. Conclusion An anchor swivel that jams at the bow roller is often a system-fit problem rather than a reason to change one part immediately. Check the exact contact point, chain link geometry, connector width, joint travel and anchor approach angle. Compare the full assembly with the bow roller and windlass path, and verify load ratings separately from chain-size labels. A controlled sample fit can reveal a mismatch before it becomes an expensive or hazardous problem on the water. FAQs Will a Larger Anchor Swivel Stop Jamming? Not necessarily. A larger connector may have more body width and create even less clearance. Check the chain connection and the full bow roller path before selecting a different size. Does a Double Swivel Eliminate Anchor Chain Twist? It may reduce twisting in a compatible assembly, but it cannot compensate for incorrect chain routing, restricted articulation or a poor anchor approach angle. Inspect the whole retrieval system. Is AISI 316 Enough to Verify an Anchor Connector’s Load Capacity? No. AISI 316 identifies the material family, not the connector’s tested load capacity. Request strength data and the manufacturer’s usage instructions for the specific size and construction.  
    TOP-Clamp-On vs Flush-Mount Fishing Rod Holders Which Fits Your Boat

    Clamp On or Flush Mount Fishing Rod Holders — Which Is Right for Your Boat?

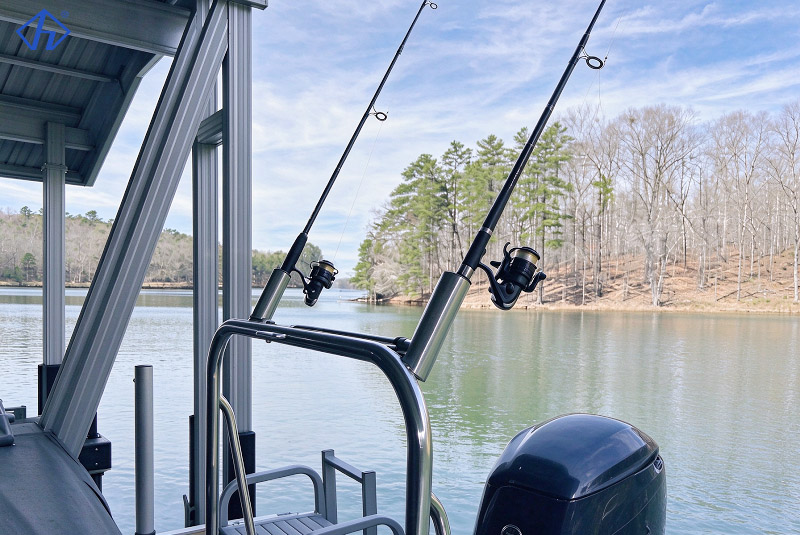
    You need a rod holder that lets you get to your rod easily, and won’t hinder you moving about the boat. Yet a holder that looks right in a catalog can create a difficult retrofit if it needs more deck depth than expected or clamps to the wrong rail. The main choice is between a clamp-on fishing rod holder attached to existing tubing and a flush-mount rod holder set into a suitable gunwale or deck surface. This guide compares their installation demands, fishing positions and ordering details so boat owners, installers and marine hardware buyers can select a workable design.   How Do Clamp-on And Flush-mount Rod Holders Compare? Both support fishing rods, but they pass loads to different parts of the boat. The mounting setup counts just as much as the stainless steel fitting. What Does a Clamp-On Fishing Rod Holder Attach To? A clamp-on design fastens around an existing boat rail or suitable tube. It avoids cutting a large opening in the deck and may allow the holder to be moved later. Some designs can rotate or tilt, but the available adjustment depends on the specific model. Check the actual rail outside diameter and clamp geometry before ordering; a holder sold as “rail mount” is not automatically compatible with every railing. HIEVER lists adjustable and rotating stainless steel clamp-on fishing rod holders in its fishing hardware range. The correct configuration still needs to be matched to the boat’s rail and fishing position. How Is a Flush-Mount Rod Holder Installed? A flush-mount design passes through a prepared opening, leaving the mounting flange close to the gunwale surface. This can keep the deck edge less cluttered, but the installer needs access beneath the fitting for its tube, fasteners and any drain connection. A cored deck also needs appropriate treatment of the exposed core to prevent water entry. For example, HIEVER’s 316 stainless steel flush-mount rod holder with rubber cap is listed at 260 × 40 mm with 0°, 15°, 30° and 55° angle options. These are product options, not universal dimensions for every flush-mount fitting. Which Mounting Style Fits Your Available Space? A quick measurement of the boat will eliminate unsuitable products before price or finish becomes part of the discussion. What Should You Measure for a Rail Installation? Measure the rail’s outside diameter, usable straight length and distance from stanchions, corners and handholds. Check whether the clamp could block a walkway or strike a seat when a rod is inserted. Thin, loose or decorative tubing may not be an appropriate support for fishing loads. The rail and all connected fittings have to be evaluated together. A sturdy‑looking clamp alone doesn’t guarantee a safe install What Should You Inspect Before Cutting a Deck Opening? For flush mounting, confirm the flange footprint, cutout size, under-deck depth and tool access around every fastener. Look for wiring, hoses, structure and existing hardware behind the proposed location. If the fitting has a drain, plan a suitable discharge route instead of allowing water to collect in a closed compartment. Use a template and verify the actual supplied part before drilling. How Do Fishing Style and Rod Angle Affect Selection? A boat used for casual inshore fishing may need a different holder position from one used for trolling or managing several rods at once. Don’t only look at the holder. Check where the line runs and the space the rod needs. When Should You Go with an Adjustable Clamp-on Holder? These removable, adjustable holders suit boats with changing fishing arrangements, or cases where permanent deck changes aren’t wanted. However, an adjustable joint introduces another connection to inspect. Confirm that its locking mechanism holds the selected angle under the intended working conditions, and check that the rod can be removed without hitting nearby equipment. When Does a Fixed Flush-Mount Position Work? A flush-mount holder can provide a consistent position along a fishing gunwale. Its fixed location is useful when the boat’s fishing arrangement is already established and the builder has provided suitable support beneath the mount. Compare the listed tube angle with the intended line path and nearby holders. A steeper angle is not automatically better: clearance, rod length and how the boat is actually fished determine the fit. What material and fit things to check before ordering? Boat parts exposed to the elements need corrosion protection. A shiny polish doesn’t guarantee the rod butt, clamp or fasteners fit as they should. Is 316 Stainless Steel Enough to Make Sure It’s Suitable? 316 stainless is popular for chloride-exposed marine fishing rod hardware, HIEVER specifies this material on its clamp-on and flush-mount models. Even with 316 stainless steel, remove salt deposits and inspect sheltered joints, fasteners and any cap. Buyers should ask for the material grade and finish rather than inferring either from product photographs. Which Measurements Belong in a Purchase Inquiry? State the rod butt diameter, preferred tube angle, number and spacing of holders, installation surface, and expected fishing use. For rail versions, add the rail outside diameter and tube shape. For flush versions, provide the mounting thickness, available depth, cutout and drainage requirements. Ask for a dimensioned drawing and confirm the mounting kit and liner or cap supplied with the exact model. How Can HIEVER Support a Rod Holder Purchase? Supplier communication is most useful when the buyer sends the actual installation details instead of asking for a generic “boat rod holder.” What Should Distributors and Boatbuilders Confirm? Yantai Hiever Metalworks Co., Ltd. lists clamp-on, rotating and flush-mount fishing rod hardware in its marine product range. It also states that OEM and ODM orders can be discussed from customer drawings or physical samples. Buyers can compare the published holder options with their rail or gunwale geometry, then request drawings, material confirmation, sample approval and packaging requirements before committing to a production quantity. Conclusion Choose a clamp-on fishing rod holder when the boat has an appropriate rail and installation flexibility matters. Consider a flush-mount rod holder when the gunwale provides adequate structure and below-deck clearance for a planned, permanent position. Neither style should be chosen from appearance alone. Double-check connection sizes, load route, rod angle, drainage, salt exposure and room for maintenance against your real boat before ordering. FAQs Is It Possible to Mount a Clamp-on Rod Holder With No Deck Cutting? Usually yes. A proper clamp-on holder clips onto the existing rail, though the rail must have correct dimensions and strong support. Some designs may still need assembly fasteners or other adjustments. Does a Flush-Mount Rod Holder Always Need a Drain? Not every product uses the same drainage arrangement. Check the model’s installation instructions, expected water exposure and location beneath the deck; do not assume a rubber cap alone makes the installation watertight. Should I Choose a Rod Holder by Its Listed Tube Angle Alone? No. The angle must work with the fishing method, rod length, nearby equipment and mounting geometry. Confirm the final installed orientation and rod-butt fit with the specific product.  
    TOP-How Should Boatbuilders Compare Cross Bollards and Double Horn Mooring Bollards

    How Should Boatbuilders Compare Cross Bollards and Double Horn Mooring Bollards?

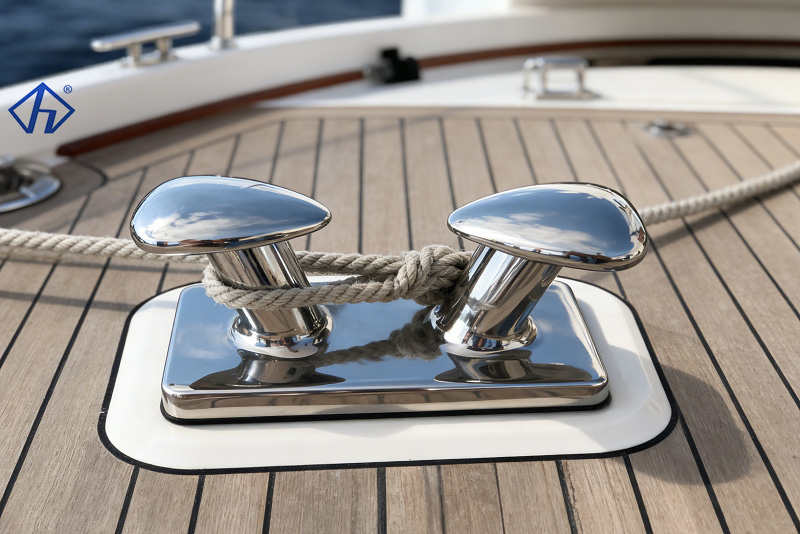
    Mooring bollards serve as essential load-bearing points. You will find them within HIEVER’s marine cleat and bollard range. These fittings transfer mooring-line forces safely into a dock, pier, berth, or vessel structure. Cross bollards and double horn bollards can both secure ropes effectively. However, their unique shapes influence how lines are routed. The shape also affects how crews tie off and how the base handles stress. Therefore, your choice must depend on the actual working setup rather than just visual appeal. What Is the Role of a Mooring Bollard? A mooring bollard provides a strong fixed anchor point. Crews use it to place, redirect, or secure a rope. The overall performance of this hardware relies on several factors. These include the line angle, mounting plate, and fasteners. The strength of the backing structure and the expected vessel movement play crucial roles as well. How Does a Cross Bollard Work? A cross bollard features a central body equipped with opposing arms. This layout naturally creates multiple rope paths. Consequently, an operator gains more than one option to lead a line. This setup helps organize spring, bow, or stern lines within a very compact footprint. It proves highly useful when a boat or dock requires a versatile tie-off point. It achieves this without relying on a large, projecting horn. What Are the Practical Benefits of a Cross Design? The primary advantage lies in routing flexibility. A rope can approach the fitting from various directions. At the same time, it remains securely captured around the central post. Furthermore, a properly designed base spreads the applied force across all its mounting points. This prevents the hardware from relying on just one narrow contact area. HIEVER’s single cross bollard is crafted from AISI 316 stainless steel. It features a bright mirror-polished surface. The product has 62 × 62 × 85 mm dimensions. These traits make the model an excellent fit for tight mooring locations. It works perfectly when those dimensions align with your specific installation needs. How Does a Double Horn Bollard Differ? A double horn bollard features two distinct, horn-like ends. These extensions help keep a rope firmly on either side of the main body. HIEVER offers a verified double horn bollard model designed for yacht and dock applications. This classic shape is quite common on docks and larger berths. It provides a very clear area to wrap and divide multiple lines. It stands out as a practical option when the crew manages various mooring directions. It is also ideal when the hardware needs to offer a highly visible line-retention profile during frequent docking tasks. When Should Buyers Choose a Cross Bollard or a Double Horn Bollard? The ideal choice depends entirely on your specific mooring layout. There is no universal ranking to follow. You should start by looking at the line path and the supporting structure. After that, compare the working space required by each fitting. Compare Line Direction and Working Space A cross bollard often appeals to buyers dealing with tight spaces. It works well when multiple approach angles must fit into a small area. Its lower profile provides a distinct advantage. This matters greatly when deck clearance or walkway space is limited by nearby gear. On the other hand, a double horn bollard might be the better option for certain setups. It shines when ropes require clearly separated wrapping zones. Operators also prefer it when they need a prominent horn for constant line handling. Sometimes, the line lead shifts direction before it reaches the bollard. In that situation, you should check if a marine bow chock is necessary. This extra part will help guide and shield the rope. In every scenario, always ensure the rope can be attached and removed easily. Avoid creating sharp bends or allowing the line to rub against nearby hardware. Match the Bollard to the Vessel and Berth Different marine environments involve unique mooring patterns. Small craft, fishing-port gear, and inland-waterway vessels all have distinct needs. Private yacht berths and water-operation platforms also vary greatly. A compact bollard might fit perfectly on a small berth. However, it could fail completely in a heavy-duty commercial setting. Buyers must assess several environmental factors. These include vessel displacement, windage, water current, and wave action. Surge forces, line size, and the use of shared lines also require attention. Product dimensions serve only as an initial guide. They can never replace a proper structural load review. Consider the Base and Fastening Arrangement The base is responsible for transferring line tension directly into the deck, dock, or support structure. You need to examine the footprint and the hole pattern carefully. Also double-check the edge distance, fastener size and backing plate specs. Make sure you’ve got enough space to tighten the bolts. A shiny, polished fitting mounted on a weak surface will never provide safe mooring. When working on retrofit projects, always measure the current footprint. You must also inspect the condition of the surrounding material. For new construction, make sure to display the bollard, backing plate, and load path clearly on the same engineering drawing. Which Material and Finish Suit Marine Mooring Hardware? Mooring hardware faces harsh conditions daily. It can stand up to salt spray, high humidity, heavy rain, and constant wear from ropes. The equipment also sees repeated wet and dry cycles. That’s why we use AISI 316 stainless steel for such harsh environments. It’s far more resistant to chlorides than 304. Picking the right material is just the first step though. That choice must be backed by precise casting and strong threads. Clean surfaces and the use of compatible fasteners are equally vital. Why Does Surface Finish Matter? A bright mirror-polished finish delivers the premium look expected on luxury yachts. It also makes everyday cleaning tasks much simpler. Yet, this smooth surface does not eliminate the need for proper drainage. Routine inspection and active corrosion control remain necessary. Hidden crevices near the base can trap salt easily. Damaged polish and contact with different metal types will quickly reduce the product’s lifespan. Buyers must clearly specify both the material grade and the desired finish. Afterward, they should establish a clear plan for cleaning and inspecting the hardware once installed. How Should Buyers Check the Mooring System Before Ordering? A thorough purchase request needs to include specific details. It should list the vessel or berth type, along with the rope diameter and material. You must mention the expected line directions and the exact fitting quantity. Describe the mounting surface, the available footprint, and the fastener layout. Also, state the preferred material, finish, and the daily operating environment. Supplying drawings or photos with accurate measurements is extremely helpful. This visual data is much better than providing just a product name. Sometimes, the bollard belongs to a larger dock or deck system. In that case, include details about nearby cleats, fairleads, and chocks. Show the access zones as well. This information allows the supplier to check for potential interference and verify the line path. What Can OEM Buyers Ask a Mooring Bollard Supplier to Confirm? HIEVER’s verified Mooring Bollard product range features both cross bollard and double horn bollard styles. OEM buyers should request several confirmations from their supplier. Ask them to provide material certificates and exact dimensional tolerances. Request clear details regarding mounting holes, casting quality, and polishing standards. Packaging protection and sample approval procedures are also essential topics. These verification steps are incredibly important. They matter most when a bollard needs to align with an existing hole pattern. They are equally crucial when integrating the hardware into a brand-new deck layout. If you have a compact application, take time to review the verified single cross bollard product page. The highlighted model is built from sturdy AISI 316 stainless steel. It’s supplied with full mirror polish, size 62 × 62 × 85 mm. A double horn design needs to be judged using the exact same project criteria. You should never select it simply because it looks bigger or heavier. Always send the intended load data and mounting specifics to the supplier. Do this before asking them for a final product recommendation. Conclusion Both cross bollards and double horn bollards function as highly effective marine mooring hardware. However, they address slightly different rope handling and space challenges. Cross designs focus heavily on compact, multi-directional line routing. Meanwhile, double horn designs deliver a much clearer separation and retention profile. This makes them great for constant line handling. Some buyers might compare a bollard directly with a boat cleat. In this situation, you must compare the line path and the mounting structure carefully. Never treat these two distinct fittings as simple drop-in replacements for one another. Your final decision needs to account for line direction and vessel movement. Think about the berth layout, base footprint, and the strength of the backing structure. Material selection, surface finish, and future inspection accessibility all matter a lot. The best way is to send over a detailed RFQ together with your technical drawing. This allows the manufacturer to match the bollard to the actual load path and installation site. It prevents them from merely supplying a fitting based on looks alone. FAQs Are Cross Bollards and Double Horn Bollards Interchangeable? No, they can’t simply replace each other.Their specific rope paths, base footprint, and overall height often vary. Their mounting requirements can differ significantly as well. Therefore, any replacement project must start with precise measurements. You must also conduct a thorough review of the current line arrangement. Is AISI 316 Stainless Steel Enough to Confirm Bollard Quality? No, the material alone doesn’t guarantee good bollard quality.The material grade is certainly important. However, overall performance relies on many other details. Casting quality, precise dimensions, and strong fasteners matter immensely. The backing plate, surface condition, and the integrity of the supporting structure also dictate success. Which Bollard Is Better for a Small Yacht Berth? A compact cross bollard usually works well when available space is tight. It is especially useful if ropes approach from multiple angles. Even so, the final choice depends heavily on the expected physical loads. You must also factor in the rope size and the overall strength of the mounting structure. What Should Be Included in a Mooring Bollard RFQ? You need to include details about the specific application and the intended line size. Always state the expected load case. Describe the mounting surface, including its total thickness. Provide the required footprint, hole pattern, material, and desired finish. Finally, list the order quantity, attach technical drawings, and mention any target market or compliance requirements. Can a Mooring Bollard Be Customized? Yes, customization is entirely possible. OEM projects frequently demand a unique footprint or a specific height. You may also need a unique hole layout, special surface finish, or custom shape for the rope contact area. We highly suggest you share a dimensioned drawing or physical sample. This helps the supplier assess and manufacture your custom design correctly.
    top-Thru-Hull Fitting Below or Above the Waterline What Should Boat builders Specify

    Thru-Hull Fitting Below or Above the Waterline: What Should Boat builders Specify?

    Through‑hull fittings form a planned opening through one of a boat’s most vital structural barriers. These fittings can drain deck water, route the outflow from a bilge pump, feed in cooling‑system water, or support other onboard equipment. Where the fitting sits compared to the waterline makes a huge difference in how serious a leak would be. If you pick one based only on its outer diameter or how shiny it looks, you can easily run into issues with hose matching, proper sealing, getting to the part for work, rust‑related damage, and how easy it is to maintain later on. Boatbuilders should therefore specify the complete installation rather than treat the fitting as an isolated metal part.   Why Does the Waterline Position Change the Specification? The same-looking fitting can face very different loads depending on where it is mounted. The relevant reference is not merely the static waterline shown on a drawing. Designers must also consider loading, heel, trim, wave action, planing attitude, and water retained on deck. These conditions determine whether an opening remains dry, becomes intermittently immersed, or stays continuously exposed to outside water pressure. What Changes Below the Waterline? Below-waterline penetrations deserve the most conservative treatment because a failed connection can admit water continuously. The fitting, backing arrangement, sealant, hose, clamps, and any required shutoff device must be evaluated as one system. The hull laminate or plate must have enough sound bearing area, and the installer needs access to inspect and operate connected equipment. Don’t assume a stainless steel through‑hull is safe for below‑waterline use just because it’s AISI 316 grade. The shape, wall thickness, how far the threads engage, how you fit it in, and whether it works well with the other metal parts connected to it all matter just as much. How do things work for fittings above the waterline? Outlets fitted above the water level usually don’t pose as big a risk of flooding. That said, they can still get underwater if the boat tilts, is loaded down heavy, or takes on wave splash. These discharge openings need to be placed high enough and piped correctly to prevent any water from siphoning back onboard. Builders should document the lowest expected position of the opening under operating conditions rather than label every fitting above the design waterline as permanently dry. Which Technical Details Should Appear on the Drawing or RFQ? A useful specification allows the supplier, boatyard, and installer to evaluate the same part without relying on a product photograph. It should define both the fitting and its relationship to the hull and connected system. Connection and Flow Requirements State whether the fitting uses a hose tail, straight thread, tapered thread, flange nut, scoop, or another connection. Include the actual thread standard and size rather than writing only a nominal diameter. For a hose connection, provide hose inside diameter, barb length, clamp space, bend radius, working medium, and required flow. A cooling-water intake has different needs from a deck drain or bilge discharge. Where debris may enter an intake, a purpose-designed scoop strainer may be appropriate, but its direction and open area must suit the system. Hull and Installation Dimensions Specify hull material, local thickness, hole diameter, external flange diameter, internal clearance, and permitted projection. Curved hull areas may not give a flat flange full contact, while cored structures require a prepared and sealed penetration. The drawing should also show installation orientation and tool access. Material and Surface Finish AISI 316 stainless steel is widely selected for chloride-exposed marine hardware because its molybdenum content improves resistance compared with common 304 grades. However, grade identification alone does not guarantee performance. Buyers should request material verification, controlled casting quality, clean threads, and a finish appropriate to the location. Mirror polishing looks fantastic on yacht hardware that’s exposed to view and definitely makes these parts much easier to clean up. Even so, a nice polish alone can’t fix poor workmanship issues — including hidden gaps, manufacturing residue, improper water drainage, or galvanic corrosion caused by pairing with incompatible metals. How Should Boatbuilders Control Leakage and Corrosion Risks? Reliable installation depends on interfaces that are often outside the fitting manufacturer’s direct control. The specification should assign responsibility for sealant selection, backing, fastening, bonding decisions, hose support, inspection, and commissioning tests. Plan the Seal Around the Actual Hull Material Sealants must be compatible with the hull, the fitting, and the expected service medium. The flange nut should seat evenly without being forced to bridge an irregular surface. Tightening should compress the sealing layer uniformly rather than distort the fitting or crush a cored laminate. After curing, the installation should be checked for movement and leakage under realistic conditions. A sample installation is especially useful when a new flange geometry or custom hull construction is involved. Prevent Crevice and Galvanic Corrosion Stainless steel performs best when its surface remains clean and oxygen is helpful to maintain the passive film. Permanently damp, tightly shielded crevices can become more aggressive than an exposed polished surface. Dissimilar metals also require a deliberate corrosion-control strategy. Builders should review the complete metal path, electrical bonding policy, fasteners, seacock or valve material, and surrounding structure. Mixing components casually can undermine an otherwise suitable SS316 fitting. Inspect the Whole Assembly, Not Only the Flange Nut Commissioning should include the hose connection, clamps, valve operation where fitted, thread engagement, and future inspection access. Below-waterline systems should be checked after installation or maintenance. Above-waterline outlets should be observed during discharge and relevant heel or loading conditions. Records of part number, material, sealant, installation date, and connected system simplify maintenance.   What Should an OEM Buyer Send to the Manufacturer? HIEVER‘s verified through-hull fitting product range includes cast AISI 316 outlets and intake scoop strainer,etc. For a standard-product inquiry, buyers should provide the intended function, mounting position, waterline relationship, connection size, thread or hose specification, hull thickness, quantity, and target market. For a custom part, a dimensioned drawing is preferable to marked-up photographs alone. If the installation is an engine-water intake, buyers can also review the verified cast threaded thru-hull intake scoop strainer. The RFQ should state flow requirements, direction of travel, strainer orientation, debris conditions, mating hardware, and whether a sample must be tested before production. Material certificates, dimensional inspection, surface-finish criteria, packaging protection, and lot traceability should be agreed before the purchase order rather than after delivery. Conclusion Specifying a thru-hull fitting begins with its position relative to the real operating waterline, but it does not end there. Boatbuilders must connect location with system function, flow, hull construction, connection type, material, sealing, corrosion control, service access, and testing. Below-waterline openings require especially conservative design because a failure can create continuous water ingress. Even outlets sitting above the waterline deserve a second look — think about how the boat heels, how it sits when loaded, and what waves can do. And it pays to get the drawing and request for quotation right up front. That way the supplier can deliver a fitting that actually goes in cleanly, can be inspected, and stays serviceable as part of a boat that’s safe to run. FAQs Can Every SS316 Thru-Hull Fitting Be Installed Below the Waterline? No. SS316 improves corrosion resistance, but suitability also depends on fitting geometry, wall thickness, connection design, sealing, backing, shutoff arrangements, adjoining metals, and the vessel’s applicable standards. Is the Static Waterline Enough to Classify the Installation? No. The opening’s position should also be checked under expected loading, heel, trim, planing, and wave conditions because a nominally dry outlet may become immersed in operation. Should a Thru-Hull Outlet and Hose Be Selected Separately? They should be specified as a connected system. Hose diameter, bend radius, barb engagement, clamp space, support, flow, and access can determine whether the final assembly performs reliably.

    top-What need to know about picking the right fuel tank vent for your boat

    What need to know about picking the right fuel tank vent for your boat? 

    Your tank’s vent makes sure air can move both in and out. This happens when you use, add, heat, or cool the fuel. A bad match between the vent, hose, and mounting spot can cause problems. Your system can end up building pressure or pulling a vacuum. You’ll run into issues like slow fillups, the gas nozzle clicking off too soon, fuel fumes hanging around, or even water seeping into the tank. Therefore, picking the right fitting takes real effort. You cannot just pick a shiny part that fits the hole. Buyers need to check the hose size and the vent layout. They must also look at installation space, drainage, and materials. The whole fuel system matters too. The Stainless Steel 90 Degree Elbow Tank Vent Marine Flush Mount Fuel Gas Tank Vent for Boat from HIEVER is a solid choice. It works well for setups using a 16 mm (5/8-inch) vent hose. It is especially useful when space behind the mounting area is tight.   Why Does a Marine Fuel Tank Need a Vent? A tank is never a completely sealed, static box. The amount of air inside changes constantly. This shift happens during filling, fuel use, and temperature swings. A proper vent path balances these shifts. It also keeps the fuel system safe and controlled. What Happens During Filling and Fuel Use? When fuel goes into the tank, the old air needs a clear way out. A blocked vent path causes trouble. Fuel might back up into the fill hose. It can also make the pump nozzle shut off over and over. As the engine burns fuel, fresh air must come inside to replace it. A clogged vent creates a vacuum. This vacuum will mess up the fuel delivery. However, these issues might stem from other parts. You should check the vent alongside the entire system. Do not just blame the vent for every single fueling issue. How Should You Match the Vent to the Hose? Hose compatibility is the very first detail to check. A good-looking vent is totally useless if the tail fails to fit the installed line. You must measure and identify the actual hose. Never rely on a quick visual guess. Why Does Hose Diameter Even Matter? The HIEVER 90degree elbow fits 16 mm (5/8inch) hose. Just make sure your hose’s inner diameter matches this spec when you order.They must also check the hose material. Make sure it is approved for your specific fuel and market. The connection has to hold the clamp tightly. It must do this without hurting the hose. Never assume a similar metric or imperial size will work. Close numbers do not always mean a perfect fit. When Should You Go With a 90Degree Elbow Tank Vent? This type bends the hose immediately right behind where it mounts on the outside.This turn can fix tight spacing problems. Still, its true value depends on your actual compartment layout. HIEVER’s marine ventilation hardware offers this elbow model. They also provide straight tank vent fittings and other elbow shapes. This variety lets buyers pick the best connection. You never have to force a single design onto every boat. How Does an Elbow Tank Vent Help in a Shallow Installation? Sometimes you have very little room behind the hull or mounting panel. In these spots, a straight vent might aim the hose right at a wall. The 90-degree body points the line sideways instead. This simple change reduces the needed depth. Before you place an order, check the elbow direction. Look at the total body size and the tool access for tightening. Also, make sure the hose can reach the tank safely. It should avoid low spots and sharp bends. Where Should the Fuel Tank Vent Be Installed? The mounting position changes how much water hits the vent. It also affects hose drainage, repair access, and distance from windows or doors. Setup rules change based on the vessel type and the target market. Therefore, builders and installers must read the strict marine fuel-system guidelines. How Can the Installation Reduce Water Entry? The HIEVER product features a cup-cover and elbow shape. It includes a built-in water-resistant baffle. Even with this clever detail, you must plan the mounting spot and hose path carefully. Stay away from areas that take heavy bow spray. Avoid spots with heavy deck runoff or direct pressure washing. Always follow the manufacturer’s layout advice. Route the hose smartly. This ensures random drops of water do not flow down into the tank. Why Do Material and Finish Matter? Outside marine hardware faces harsh conditions. It holds up well against saltspray exposure, muggy conditions and intense sunlight. On top of that, it can take heavyduty cleaning products and repeated backandforth wetdry cycles without issues.The base material and outer finish are vital. They control rust resistance, overall looks, cleaning ease, and future upkeep. What Does HIEVER Specify for This Tank Vent? HIEVER builds this model from strong 316 stainless steel. It features a bright, highly polished surface. The product page calls out its unique cupstyle cover and 90degree elbow design. Plus, it’s made to work with 16 mm (5/8inch) hoses. Buyers making an OEM or bulk order need to check these details on their quote. They should ask for a fresh size drawing before they approve production. Some buyers might want to compare this vent with other fittings. They can read HIEVER’s deck fill and garboard drain plug guide. This guide helps explain the differences between filling, venting, and draining tasks. Why Consider HIEVER as a Marine Tank Vent Supplier? Yantai Hiever Metalworks Co., Ltd. provides quality stainless steel marine hardware. The company claims over 20 years of solid industry experience. They offer more than 300 standard items. They also have full OEM/ODM skills using client drawings or physical samples. When buying tank vents, customers should share key details. Tell them the hose size, mounting spot, and free space. Also share your material needs, order amount, and target market. The supplier will then compare a standard unit against a custom fix for you. Conclusion Picking a marine fuel tank vent begins with the hose and the mounting space. You must verify the true hose diameter and the needed air path. Also check the mounting spot, water risks, and the wall depth. Do not forget repair access, metal choices, and local safety rules. A 90-degree elbow model proves very helpful in tight spots. It works great when a straight body hits a wall or forces a bad hose bend. HIEVER’s 316 stainless steel vent gives a shiny 90-degree choice for a 16 mm (5/8-inch) hose. Still, your final choice must rely on the entire fuel-system plan and an updated size drawing. FAQs What Hose Size Works With  HIEVER 90Degree Marine Fuel Tank Vent? According to its official listing, it takes a 16 mm (5/8inch) hose.You should check the true inner diameter of your hose. Look at the material and the clamp setup. Always confirm the local fuel-system rules before you buy. Is a 90degree Fuel Tank Vent Actually Better Than a Straightstyle One? It works better when shallow walls or tricky hose paths make a straight part hard to fit. A straight vent stays simpler if you have plenty of room. It is fine when the hose runs smoothly without sharp turns. Your actual boat layout must drive this final choice. Can a Marine Fuel Tank Vent Keep Water Completely Out of The Fuel System? No, it can’t. A covered top and a water-resistant baffle certainly help. However, the exact mounting spot and the angle matter greatly. Hose routing, regular care, and the whole fuel system design truly control the final water risk.
    top-How to Choose a Marine Stanchion Base Tube Diameter, Mounting Angle and Deck Type

    Marine Stanchion Base’s three key factors:Tube Size, Angle and Deck Type

    A marine stanchion base acts as the link between your railing pipe or support post and the boat’s framework, so getting the wrong part can lead to headaches long before you even start fitting it in place.  For boatbuilders, repair yards, marine hardware distributors, and boat owners, the most important factors are tube diameter, mounting angle, base shape, deck condition, and material. A suitable marine stanchion base should match the rail system while fitting securely on the available mounting surface. This guide explains how to compare these factors when selecting stainless steel handrail and bimini fittings for boats ,yachts and other rail frame application,   What Should You Check Before Choosing a Marine Stanchion Base? A stanchion base should not be selected by appearance alone. Products that look similar may be designed for different tubing sizes, mounting angles, or installation surfaces. Before ordering, buyers should first confirm how the base will connect with the rest of the handrail system. Why Does Tube Diameter Matter? Tube diameter is one of the first specifications to check because the rail and base need to work as one system. A fitting designed for a 22 mm tube should not automatically be assumed to fit a 25 mm or 32 mm tube. For replacement projects, measure the outside diameter of the existing tubing instead of relying only on an old purchase record. In new boatbuilding projects, keeping tube dimensions consistent across the rail system also makes it easier to match elbows and tees, rail ends, stanchion bases, and other marine handrail fittings. HIEVER’s 30-degree rectangular stanchion base is available for 22 mm, 25 mm, and 32 mm tubing, giving buyers several commonly used sizes within the same product family. How do you pick the correct angle for your stanchion base? The mounting angle dictates how the handrail slopes as it comes up off your boat’s deck or hull side.The correct angle therefore depends on both the mounting surface and the desired rail geometry. When should you go with a 30degree stanchion base? This type of marine stanchion base works well in situations where the post has to angle out from its mounting surface, rather than sitting straight up at 90 degrees. This is relevant when handrail tubing follows the sloping profile or design lines of a boat. HIEVER offers a Rectangle Stanchion Base 30 Degree (22/25/32mm) with a mirror-polished finish. Its marine stainless steel construction makes it suitable for visible rail systems where both durability and appearance are important. The correct angle should still be confirmed from the actual installation position. Don’t just pick a 30degree base because it looks roughly right for your needed angle — this can lead to alignment issues further down the rail run. When Should You Consider 45°, 60° or 90° Bases? Different locations on the same vessel may require different mounting angles. HIEVER’s stanchion-base product range includes rectangular options at 30°, 45°, 60°, and 90°, along with round-base designs. A 45degree base works well for gentle slopes, whereas the 60degree variant creates a much more pronounced offset between the post and its mounting surface. The 90degree rail base is typically the better choice whenever the stanchion needs to sit straight up, perfectly square against the mounting plane. For OEM work or brandnew builds, it’s best to doublecheck the required angle using rail drawings or realworld installation dimensions before placing your order for these fittings. How Does Deck Type Affect Marine Stanchion Base Selection? The mounting surface affects more than appearance. The base needs sufficient installation space, a suitable contact area, and access for secure fastening. What Should You Check on a Flat Deck? A broad, flat deck often provides more flexibility for positioning a rectangular stanchion base. However, installers still need to consider the size of the base, fastening locations, nearby deck edges, and access below the mounting area. For replacement work, checking the footprint of the existing fitting can help determine whether a new base can use the same location. A product with the correct tube diameter but a significantly different base shape may require new mounting points. This is especially important for distributors supplying replacement boat rail fittings, since the customer may expect a part that fits an existing installation with minimal modification. What About Side Mounting or Limited Spaces? Not every marine handrail base is installed on a large horizontal deck. Some installations are located on yacht sides or other restricted surfaces. HIEVER notes that its rectangular rail bases can be used on yacht decks and sides. In these situations, base shape becomes important. A rectangular base may work well where there is a clearly defined flat mounting zone, while a round stanchion base may be more suitable where available space or surrounding geometry favors a compact footprint. The actual mounting surface should therefore be checked before choosing between round and rectangular designs. What makes 316 stainless steel critical for boat stanchion bases? These fittings face continuous exposure to salt spray, damp conditions and rain, constantly switching between wet and dry out on the water. The material you opt for will directly impact both corrosion performance and how good the hardware stays looking long term. So what material should you actually be shopping for? AISI 316 stainless steel is what most boat hardware relies on, since it handles all that saltheavy seawater exposure really well. HIEVER uses AISI 316 stainless steel throughout its full line of stanchion bases, covering both round and rectangular rail base styles. Its stanchion bases also use polished surfaces to provide the bright appearance commonly expected on yacht handrails and exposed boat hardware. It’s easy to mistake a shiny polish for quality material, so always crosscheck the stainless steel grade on your quotes and product specs. Routine freshwater washing will also help clear away salt residue and dirt buildup. What Information Should You Provide Before Ordering? Many sourcing problems come from incomplete dimensions rather than complicated technical issues. A clear RFQ can greatly reduce the risk of ordering the wrong stainless steel stanchion base. Which Specifications Help a Supplier Select the Correct Base? Buyers should provide the tube outside diameter, required mounting angle, preferred base shape, mounting location, quantity, and material requirement. Photos with dimensions are particularly useful for replacement parts. For custom or OEM projects, a technical drawing or physical sample can provide additional information about hole locations, dimensions, tube orientation, and surface geometry. It is also useful to describe the complete rail system rather than only the individual base. Matching stanchion bases with tube elbows, tees, end fittings, or other stainless tube fittings can help maintain consistency throughout the finished assembly. Why Is HIEVER a Reliable Marine Stanchion Base Supplier? Choosing the right product also depends on finding a supplier that can support different rail configurations and purchasing requirements. What Can HIEVER Provide for Marine Handrail Projects? Yantai Hiever Metalworks Co., Ltd. supplies a broad range of stainless steel marine hardware, including rail bases, deck hinges, Bimini fittings, tube fittings, handrail fittings, and other yacht hardware. According to their website, the company has over two decades working in this industry. They stock more than 300 standard products and serve customers across 30plus countries. Their selection of marine stanchion bases covers various tube sizes, mounting angles and base shapes. This gives boat builders, resellers and OEM purchasers plenty of flexibility when picking parts to put together a full handrail system. How Should You Make the Final Choice? — Conclusion Choosing a marine stanchion base starts with three practical questions: What is the tube diameter? What mounting angle is required? What type of deck or side surface will hold the base? After these factors are confirmed, buyers can compare rectangular versus round bases, stainless steel grade, surface finish, and compatibility with related handrail fittings. For rail systems using 22 mm, 25 mm, or 32 mm tubing, HIEVER’s 30-degree rectangular stanchion base provides one available option, while 45-degree, 60-degree, and 90-degree products support other rail layouts. Accurate measurements before ordering are far more reliable than choosing a fitting from appearance alone. FAQs Can you use a 25 mm stanchion base with a 1inch tube?  Don’t just take it for granted that these two sizes will swap out for one another. Before placing your order, measure the tube’s real outer diameter and crossreference it against what the supplier lists. Even tiny differences in dimensions can mess with how parts fit and how well everything goes together during installation. Is a Round or Rectangular Stanchion Base Better for Boats? Neither shape is always better. Rectangular bases can suit defined flat mounting areas, while round bases may work well where space or surrounding geometry favors a more compact footprint. The mounting location should determine the choice. What Should I Send a Supplier When Requesting a Marine Stanchion Base Quote? Make sure to supply the tube’s outer diameter, mounting angle, base style, where it will be fitted, material requirements, order quantity, plus any drawings or photos you’ve taken of the existing setup. Getting all these details over upfront helps avoid illfitting parts and cuts down on extra rework later.
    Home
    WhatsApp
    Email
    Contacts